The first step is to Add a category. If you have lots of products, it is important to take a moment and think about how you want to organize your products. It is best to take a look at all your products, and map out all the categories you wish to enter.
Admin Main >> System >> Product Maint >> Add Category
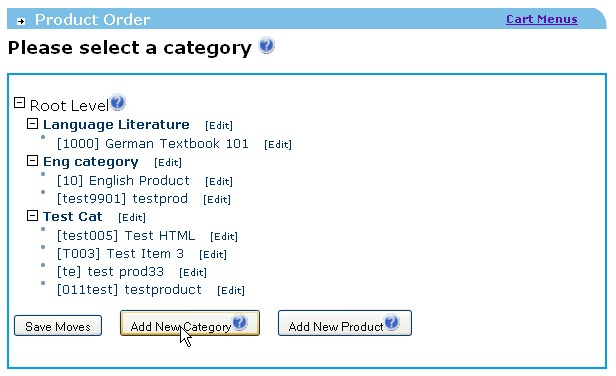
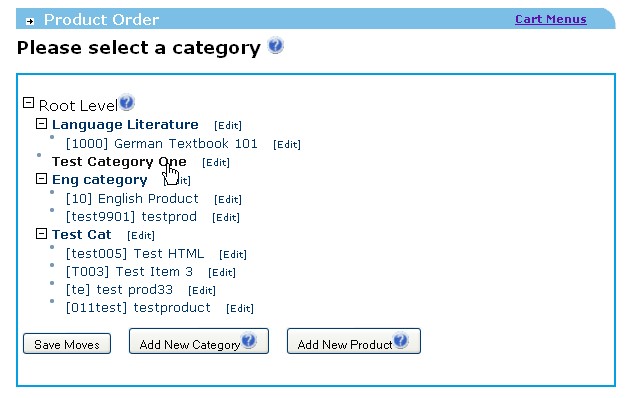
In this system, you are able to drag and drop categories and products. This means it will be very simple later to make a category a sub category of another category, or to move a product from one category to another category.
To drag and drop a category or product, simple click on the product or category, hold down your mouse and move it to another place before letting off the mouse button. Once you have done this, you will see the product or category follows your mouse around. You can position the product or category over the new place you wish it to live, and click your mouse button once more. This will drop the product or category to the new location.
A final step is to hit the "Save Moves" button once you have things looking the way you want it to look.
First select the currency you wish to add a Category for. This is a critical step as categories will only show up for the currency you have added them for. So if you add a category for USD but then the member selects Euro for which products they wish to see, the USD category will not show up. Chances are, your system is only going to be in one currency initially so this won't be an issue, just be careful!
Lets add a category first. You can decide if you want to add all your categories first, or add a category then its products, then another category then it's products. It is up to you.
Click on 'Add a New Category'.
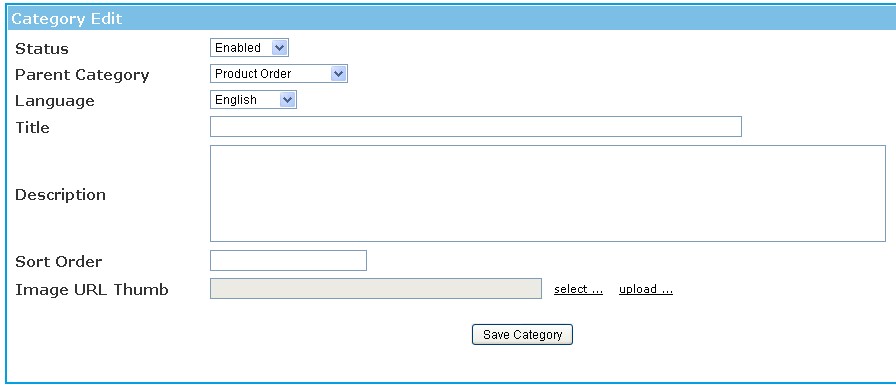
Status:
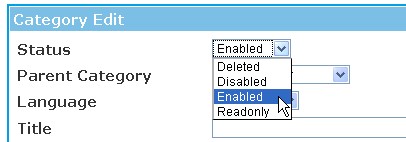
First you need to set a status for the Category. Your options are:
- Enabled.
- Disabled.
- Deleted.
Set to Enabled if you want it to show up in the public viewing areas, Disabled if for now you do not want it to show up in the public viewing area (it will show in admin area with a line through it) and Deleted if you want to delete it from the Admin and Public Viewing areas.
Parent Category:
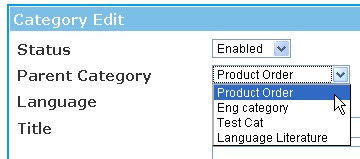
Choose 'Product Order' (default) if you want the category you are adding to be a top level category. If you would like the category you are adding to be a sub-category please select an existing category that you would like to place it under.
Language:
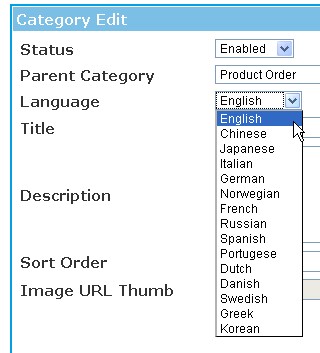
Choose the language that you wish to use.
Title:
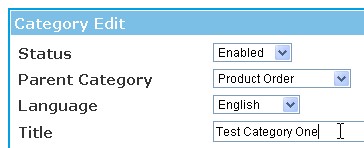
Enter a Title for the Category that you want to add.
Description:
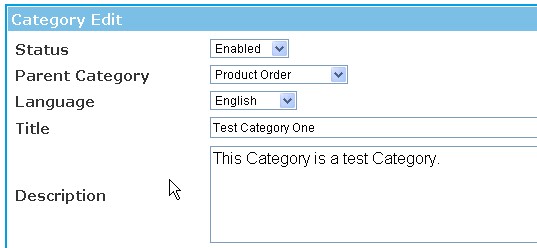
Add a short description regarding this category.
Note: if you want to clear the text from this field (to show no entry) enter a blank space. The system might not accept no text. This is especially useful when clearing default entries.
Sort Order:
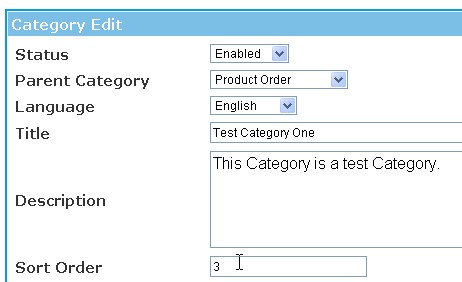
Sort order is the order in which the categories will appear; the lower the value the higher up the category will be placed. For example - if sort order is equal to 5 then it would take precedence over a category with a sort order of 10.
Image URL Thumb:
If you want to have an image associated with this category, upload it here. The select link will let you select from any already uploaded images. The upload link will let you upload a new image.

Hit 'Save Category' if all went well it will give you a message showing "1 successful, 0 failed." Hit 'OK'

You will be back to the page that shows all the categories and products.
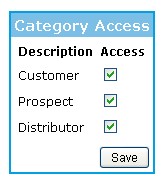
Category Access__
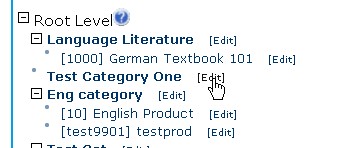
Now go take a look at the category you created. Click the 'Edit' link beside the category title.
You will notice that the bottom now has an extra section called “Category Accessâ€, this is where you setup what areas you with the category to appear in. If you have the special customer website add-on, you can check that, if not you need to decide if this category is to be for non members to view in which case you check 'prospect' and if this is for members to view, in which case you check 'members'. If both are to see this category, you need to mark both with checks.